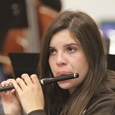
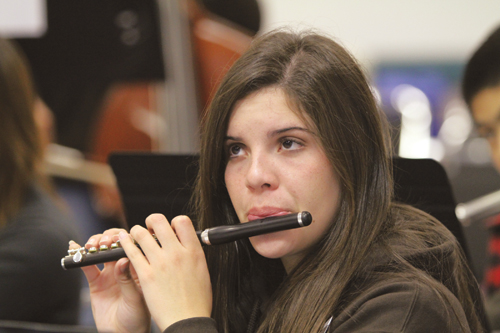
As band students progress to grade three music, the instrumentation for many compositions now includes a piccolo. A successful transition from flute to piccolo requires some additional instruction as there are some significant differences between the instruments.
History of the Piccolo
In French music, the piccolo is called the petite flûte (pte. fl.); while in German music, the kleiner flöte; and in Italian, flauto piccolo or ottavino. In intermediate level band music, it will be referred to as the piccolo. The modern day piccolo descends from the military fife of the middle ages, and its history is similar to that of the flute. As keys were added on the flute, so were they added on the piccolo. However, while the flute is now made in three parts (headjoint, body and footjoint), the piccolo continues to be built in two parts (headjoint and body). In recent times, modern piccolos include a C# trill key and the split E mechanism that are popular options on student and professional model flutes. In the early 20th century, piccolos were pitched in Db, but now are pitched in C.
Range
The modern piccolo has a range of about three octaves from D5-C8, the top note on the piano. The notes of a piccolo part sound one-octave higher than written. The notes in the lower range are generally softer, while the upper notes are on the louder side. In ensemble settings, the middle to high range is most frequently used; however, composers often use the mellow, haunting quality of the low notes for certain effects.
Specifications
Piccolos are made in a variety of materials, primarily of wood, silver, plastic (resin) or a combination of materials. Wooden piccolos are preferred for orchestral and indoor band work while silver or plastic models work best for marching band. Most wooden piccolos do not have an embouchure plate and this can be challenging for students.
How Many Piccolos?
For indoor orchestra/band rehearsals and concerts, one piccolo is the best choice because of the difficulty of tuning two piccolos to each other. The exception to this is for Sousa’s Stars and Stripes where three or more piccolos often play the solo in the trio section of the march. A good rule to remember is to either use one piccolo alone or have three or more piccolos play together.
In marching band, it is better to have all flute players play piccolos. Some university marching bands use dozens of piccolos rather than flutes on the field. This is partly due to the added projection a section of piccolos brings to the show, but also for the physical health of the flute players.
To play the flute well, the proper stance is to place the left foot forward and the right foot back; this is opposite of the feet-together stance required in marching band. In concert performance the flute is slanted slightly down, and the end of the flute is quite forward. This placement is due partly to the design of the modern embouchure hole. However, modern marching band rules require the flutes to be parallel to the ground with the end of the flute closer to the player’s body. This placement works against producing a professional sound on the flute; so many flute teachers prefer students play piccolo in marching band.
Getting Started
Many band directors select one flutist to play piccolo for the entire year. It is better to assign a different flutist to play piccolo on each piece. Since the piccolo is about half the size of the flute, and the embouchure hole is significantly smaller, the piccolo is placed higher on the lip than when playing flute, and the aperture (hole in lips) is made smaller. If a student plays only piccolo for a school year, he will lose his flute sound because he will play flute with a piccolo embouchure. It is better for the progress of each student to take turns playing piccolo. Then each player has a chance to keep his flute embouchure in shape and also receives the added experience of playing piccolo. Professional flutists are expected to switch from flute to piccolo, alto flute, and bass flute regularly.
One student often plays piccolo for an entire year because the school has only a single instrument. Student-model piccolos are relatively affordable, however, and music stores and pawn shops often have inexpensive used instruments available. Never purchase an instrument that you have not played with a tuner.
Where to Sit?
Place the piccolo player where the end of the piccolo will not be in anyone else’s ear. If your flutes are in the front row, place the piccolo player on the end of the row on the conductor’s left side (when conducting). During rehearsals and concerts, this means that several students will switch chairs between each composition. Each flutist and piccolo player should have his own music stand.
Assembling the Piccolo
Carefully remove the piccolo from the case without bending any of the keys. With the cleaning rod, gently insert the rod into the headjoint checking to be sure that the line on the cleaning rod is in the center of the embouchure hole. This is the starting point for tuning the piccolo. When assembling the piccolo, align the center of the embouchure hole with the center of the right-hand keys. Pull the headjoint approximately ¼ inch from the body. Play a D6 (sounding a D7) with the tuner. If the D6 is in tune, this is probably the best amount to pull out or push in. If the D6 is sharp, pull it out a bit more. If flat, push in.
Seeing a Pitch, Hearing Another
Since the piccolo sounds one octave higher than the written and fingered note, students have difficulty figuring out which octave they are actually in when first beginning to play. Start the student out by playing a D major scale, beginning on the lowest note (finger D4 of the flute fingering, but sounding D5) and slowly ascend the scale. Remind the student to place the piccolo higher on the lip and to make the aperture smaller by shaping the lips as if saying something like pooh or pure. A mirror is a powerful tool to see the size of the embouchure. A flat coffee stirrer straw placed in the lips will help students learn where and what to squeeze to make the aperture smaller.
Have students go up the scale several times to become comfortable playing the piccolo without the added distraction of reading notes. Play this scale slurred and tongued. Since the piccolo is smaller than the flute, the response time is quicker. Most flute players say they can easily single tongue passages on the piccolo that on the flute they would double tongue. Repeat using an ascending chromatic scale beginning on the same low D.
Repeat these scales starting a half-step higher (an Eb scale, E scale, F scale etc.) until students reach a C scale. At the highest notes, most piccolos respond better with the right-hand pinkie off for the top Bb, B, and C.
When to Play
Some composers write a separate piccolo part. This is the best option because it is clear to the flute section and the piccolo player when each should play. Other composers present one flute part with places where a player changes to piccolo. If the composer wants the flute to change to piccolo, he will write muta piccolo which means change to piccolo. At this point the flute section is tacet, and only the piccolo plays the passage. It will be indicated muta flute when the player is to return to flute. At other times a composer will write add piccolo or piccolo out in the part. In this case the other flute players continue to play the passage with one of them taking the part on the piccolo starting with the add piccolo and changing back to flute at piccolo out.
Melodic Work
While the piccolo part may be written to add punctuation or rhythmic intensity to a concert piece, many composers use the piccolo melodically. Practicing simple melodies will prepare the student for these places in the literature. A good place to start is a beginning flute method, playing the songs on the piccolo rather than the flute. Later most professional piccolo players find that Baroque sonatas (Handel, Marcello, Telemann) and the Telemann Twelve Fantasias on the piccolo produce an added dimension to their tone and expressive performance.
Out of Tune?
Every piccolo player encounters passages where a certain fingering that worked on the flute produces an out-of-tune note on the piccolo. Students should search online for alternate piccolo fingerings to try, checking the pitch with a tuner. Students should keep a diary of alternate piccolo fingerings for use in the future. Unfortunately all piccolos are not the same and what might be in tune on one brand of instrument may be out of tune on another. Remind students that the piccolo is a wind instrument, and it takes wind to generate the sound. A steady air stream is a valuable tool to have when playing piccolo.
Since the piccolo plays the highest note in the ensemble, students should listen intently to the lowest pitches in the band to learn where to set the intonation.
Practicing
Most professional piccolo players practice piccolo parts on the flute first and then practice them on the piccolo at the end of the practice session. Scales, arpeggios, scales in thirds, seventh chords and chromatic scales are good fundamental materials to review. Most etude books work well on the piccolo, and there are a few books devoted to the piccolo.
Vibrato
As the top-sounding instrument in an ensemble, a tasteful vibrato enhances the entire sound of the group. So unless it is indicated non vibrato, the player should play with vibrato. The general rule is that as the notes ascend, the vibrato speed increases. Think about the vibrato speed that a cellist employs in relationship to the vibrato speed of a violinist. In other words, a piccolo player will vibrato a bit faster than the flute players.
Never be Shy
Novice piccolo players are uncomfortable playing piccolo parts as they are written. Most want to play the piccolo part so it blends into the flute section sound. However, like other auxiliary instruments (English horn, Eb clarinet etc.), the piccolo is used for color and effect and should be heard. If the piccolo notes are not in the correct octave, (partly because of fear of being heard), encourage students to be brave and play the piccolo part out strongly in the octave where it is written. As students get more control of the instrument, they will become comfortable with the instrument’s role in the ensemble.
Safety
The piccolo’s has a high range and loud volume, so piccolo players should always wear an ear plug in the right ear. Many players have had good success with foam ones; however, students who want to eventually play professionally may want to have a custom ear plug made by an ENT doctor.
Piccolo Care
Wood piccolos should be kept at an even temperature. A piccolo should not be left in an automobile in the summer or winter. If brought into an air conditioned rehearsal room, the piccolo should warm up naturally before playing. The goal is to keep the wood from cracking.
Just as in playing the flute, students should wash hands and brush teeth (or gargle water) before playing in order to keep the inside and outside of the piccolo free from sugars or grime. At the end of a practice students should swab the piccolo out. Silk swabs are the most absorbent; however, do point out that it only takes a very small amount of cloth to fill out the inside of the piccolo. If the swab is too big, the silk will get stuck inside the piccolo and a repairman will have to take off the keys of the piccolo to get the swab out. Silk swabs are available for purchase. Another option is the Flute Flag which allows piccolo players to swab the instrument during rehearsals without taking it apart.
In recent years the piccolo’s popularity as an instrument has increased tremendously. Contemporary composers write piccolo solos and concertos, and the advent of the flute choir has added performance opportunities for flutists to play piccolo. Encourage all of your flutists to learn to play this exciting instrument.


