
 When you can play one beautiful, well-constructed note, you are ready to learn how to connect two or more notes. In 1934 Marcel Moyse wrote one of the most famous exercises in flute literature to address this skill. It is the first exercise in De La Sonorite: Art et Technique (On Sonority: Art and Technique). Moyse explains that the exercise “deals with the timbre (color) and homogeneity of tone in every register.”
Large Range
The flute has 40 standard notes – low B to D two octaves above the staff. This three-octave-plus range poses some rare problems. Obviously, there is a major color change between the lowest and highest notes. The more keys you close, the duller the sound is. Likewise, the more open keys, the brighter the sound. Flutists try to change seamlessly from one note to the next by subtly adjusting the tone color, so that listeners do not perceive exactly where the color changes take place.
I use the following color analogies with students to introduce this principle. You buy six pairs of black socks. To insure that they match after several washings, you should check the dye lot code on each pair because after repeated washings, the true color of a black socks emerges. Another analogy is with knitting. When you knit a sweater, you should be sure that all yarn skeins come from the same dye lot so the sweater will be the same exact color all over.
On the flute we want to be able to produce notes that are from the same dye lot. Only when you can control this aspect of timbre are you ready to change the color of particular notes for expressive purposes. One of the best ways to do that is to practice a tone exercise that focuses on an even tone color throughout the flute’s range.
The Embouchure Hole
The tools for connecting notes so that their color does not change are the placement of the bottom lip on the embouchure hole and the stream of air. How much of the embouchure hole to cover is a matter of personal taste. My teachers who actually mentioned this concept (Frances Blaisdell, Joseph Mariano, and William Kincaid) suggested covering approximately 1/4 of the embouchure hole with the lower lip; this is when the embouchure hole is set parallel to the ceiling. On page 53 of Johann Joachim Quantz’s book On Playing the Flute (trans. by Edward R. Reilly, Schirmer Books), Quantz has drawn four lines across the embouchure hole to illustrate how much the lip should cover for low, middle, and high D and high G. (The one word of caution to consider in evaluating Quantz’s drawing is how simply the embouchure hole of the 1700s was cut compared to the upper and undercutting of today’s models. I think the difference in the cutting affects how we play a modern headjoint.) We probably cover a tiny bit more of the embouchure hole on today’s flutes as compared with those of the 1700s.
The Air Stream
The stream of air is complicated to control because we not only have the size of the air stream to consider but also the speed, evenness, and angle. The air stream size is controlled by the opening and closing of the aperture in the lips. I have a soda straw collection for students to use, so they can experience how to open and close the aperture. The largest straw is used for drinking thick ice cream sodas, while the smallest is used for stirring cream into coffee. When students start by using the largest straw and progress down to the smallest one, they learn their natural way to open and close the aperture.
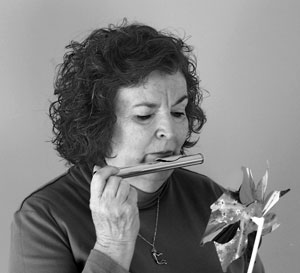 The speed and evenness of the air stream may be tested by using a pinwheel toy placed a few inches in front of the aperture.
The goal is to spin the pinwheel at a quick speed and to keep that speed going evenly for a period of time. You can also use a tuner, not trying to register the exact pitch of the note but keeping the needle steady. Actually, we only get a reliable readout from a tuner when the needle is absolutely still.
The angle of the air is controlled by the position of the lips and the placement of the tongue in the mouth. Joseph Mariano had us experiment in playing a color by changing the vowel sounds in the mouth. For example, play a note or phrase with the tongue positioned as if pronouncing a long A and then a short A. Or play while pronouncing the two forms of vase. Which version you choose is your personal preference? Experiment with all the vowels.
When practicing connection exercises, try to keep the tongue in the same place from one note to the next. Eventually, you will encounter certain places where the tongue placement has to adjust to keep the timbre the same. A critical ear will help you learn where those places are.
Perfect Connections or Slurs
Flutists have an inherent problem when changing from one fingering to the next. It is natural to slow down the air stream slightly to avoid a squeak or crack, which is, of course, to be avoided. A good way to help students experience a perfect slur is to ask them to play a low or middle G with their right hand on the flute barrel for stability.
While the student concentrates on playing a long G, step behind him and depress the F-key, which will change the pitch. He doesn’t know when the change will occur, so he keeps blowing even air through the entire process. Sometimes I actually trill the F to really show this idea.
We also have a tendency to change the air speed when we vibrate. After using a beautiful vibrato on the first note, we stop the vibrato for a nano-second until the next note is under control and then we add the vibrato back again. String players have a similar problem, but because they can see the vibrating hand, they are able to fix the problem more readily. Watching a fine violinist’s vibrato may help.
Moyse’s 4:1 Exercise
I have named the De La Sonorite first exercise the 4:1 Exercise because it starts on the fourth beat and flows into the first beat of the next measure. Moyse says to repeat each two-note pattern, striving for an even better connection the second time. The goal is to begin with your best sound and flow into the next note while maintaining the same amount of lip coverage on the embouchure hole, the same air speed, and the same angle of the air.
.jpg)
In order to have continuous vibrato, the change between notes must occur in the same part of the vibrato cycle each time. For this reason, I teach Moyse’s 4:1 Exercise with counted vibrato. At first students use three vibrato bumps on each quarter note, then 4, and finally 6. Play the exercise at a moderate dynamic at quarter = 60.
The First Note
The first note is a middle B. Many famous tone exercises begin on this note because, for most of us, it is a well-focused note. To get the best B possible, finger a low E and overblow to the third partial, which is B. Next, play the B with the actual fingering and then change to the harmonic low E fingering, maintaining the pitch from the true B fingering. The tone will be more vibrant when you use vibrato on both pitches. Once you find the lip setting for this exercise and can seamlessly alternate between the real and harmonic fingerings, you are ready to begin the Moyse exercise.
After Julius Baker.jpg)
Julius Baker taught me several variations on the following exercise. At first he had me play three or four descending chromatic notes, striving for the same smooth connection as in the Moyse 4:1 Exercise. He encouraged me to keep track of the metronome speed I used for the exercise and to try to play it at a slower metronome setting each week. He always wanted this exercise played with lots of vibrato.
Observation
For most flutists it is easier to connect smaller intervals than larger ones, and descending intervals are easier to connect than ascending ones. Part 1 of the Moyse 4:1 exercise descends, while part 2 ascends. The Baker exercise also has the added benefit of starting at the top of the range, which requires more air than if the exercises started on the lowest notes.
In order to perform the Baker exercise well, a consistent airstream at a good speed is necessary. When you play it at the beginning of your practice session, you will have really good air for the rest of the day. Flute playing takes air and energy. Even though we all try to figure out how to play without so much air and energy, we have to remember that we must put air through the flute.
After Joseph Mariano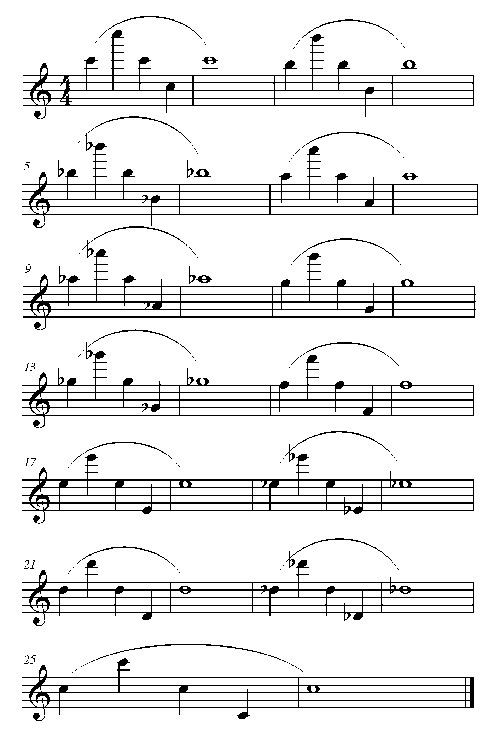
Many mornings before Rochester Philharmonic rehearsals, I heard Mariano warming up on an exercise similar to this one. You could hear his flute singing as he played the exercise ff with molto vibrato. He most definitely got the air moving.
Sometimes he would vary this exercise by adding the seventh before each C. Mariano’s exercise uses the more difficult octave interval for the connection. He believed that musical line or connection had to do with “filling the spaces” between the notes. He had the same objective as Moyse and Baker, but he added an increased vibrato speed at the end of the note before the interval.


